

Marble TV wall = "a natural work of art" + "a durable structural wall". Below is a summary of its core advantages and installation points. If you follow them, you will not fail.
1. 4 irreplaceable advantages
Appearance ceiling
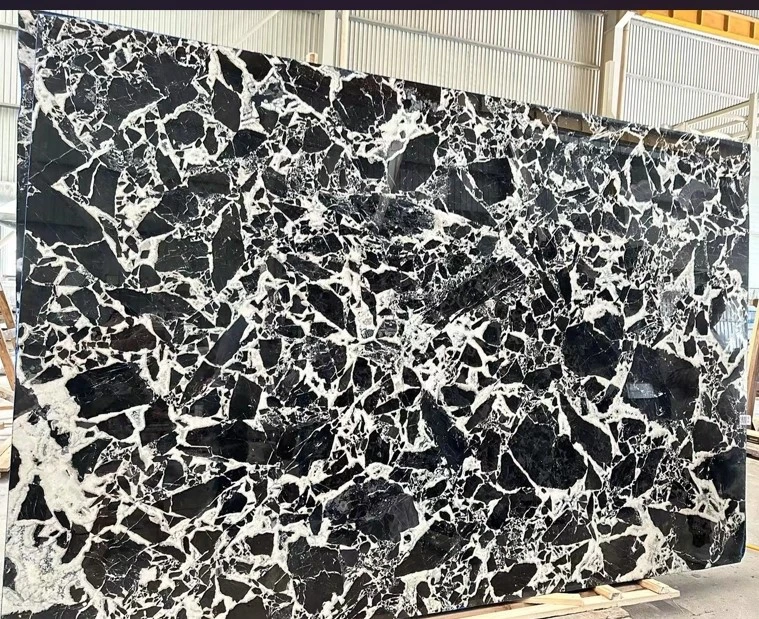
Each piece of natural texture formed over billions of years is unique. Light colors (fish belly white, elegant white) are large and bright, and dark colors (Versace black, Italian gray) have advanced filters.
Durable and refurbishable
Mohs hardness 3-4, scratch-resistant, fireproof, and moisture-proof; after 20 years of use, it can be polished back to 90% new.
Green and environmentally friendly
Radioactivity ≤ ceramic tiles and wooden floors, which belong to national Class A building materials and can be installed and lived in.
Easy to maintain
No static electricity, no dust absorption, daily clean water + neutral detergent can be wiped clean, no special maintenance cost.
2. 6 key steps of installation
Base acceptance
• Cement wall: brush moisture-proof interface agent after leveling, moisture content ≤ 8%.
• Wooden wall: must be backed with 18 mm multilayer board and fireproof coating.
Steel structure keel (hidden but most important)
• Use M8 expansion bolts to fix 40×40×3 mm galvanized square tubes to the original wall, @ ≤ 600 mm.
• The horizontal error of the whole surface is ≤ 2 mm, leaving adjustment margin for the subsequent hanging board.
Pre-layout & numbering
• Layout the ground according to the design drawing 1:1, take photos of the texture to confirm, and number the back of the board with a marker.
• Cutting, chamfering, and grooving are all completed in the factory. Only dry hanging is done on site without drilling to reduce the risk of edge collapse.
Dry hanging system
• Plate thickness ≥ 20 mm: use 304 stainless steel T-type hangers + marble glue, each plate ≥ 4 hanging points.
• TV position 55-100 inches: add two vertical keels in the corresponding area to ensure that the TV bracket screws are locked on the steel frame, not the stone slab.
Caulking & closing
• Leave a 2 mm gap, fill with foam sticks first and then apply epoxy glue of the same color, the glue surface is 0.5 mm lower than the board surface, which is both beautiful and crack-proof.
• The 45° angle of the external corner is finely ground on site without chipping and white edges; the internal corner is closed with epoxy glue of the same color to prevent black seams.
Finished product protection and acceptance
• Immediately after installation, apply 0.12 mm thick PE protective film, and tear it off after the painter leaves the site.
• Acceptance focus: flatness 2 m ruler ≤ 1 mm; height difference of the joint ≤ 0.3 mm; natural texture transition without "breaks".
3. Reminders for details that are easily overlooked
• Wiring: Put the HDMI and power cables through Φ50 wire tubes at the keel stage, leaving no exposed wires behind the TV.
• Lighting: Marble has strong reflectivity, the spotlight angle is 30°-35°, and the lamp beads are 6-8 W 3000 K to avoid light spots.
• Proportion: Stone slab height = floor height - ceiling - skirting - 10 mm expansion joint, which is the most visually obvious floor height.
In a word: The marble TV wall is "expensive" because of its natural texture and construction details. As long as the base steel frame is stable, the layout is accurate, and the glue joints are fine, the living room can be fully enhanced at one time.